In this post, I’m going to run through the lovelace dashboards that I have configured in my HomeAssistant instance.
Theme
The theme I have gone with is called Waves, I really like the Aesthetic.
You can download it from github.
Landing Page
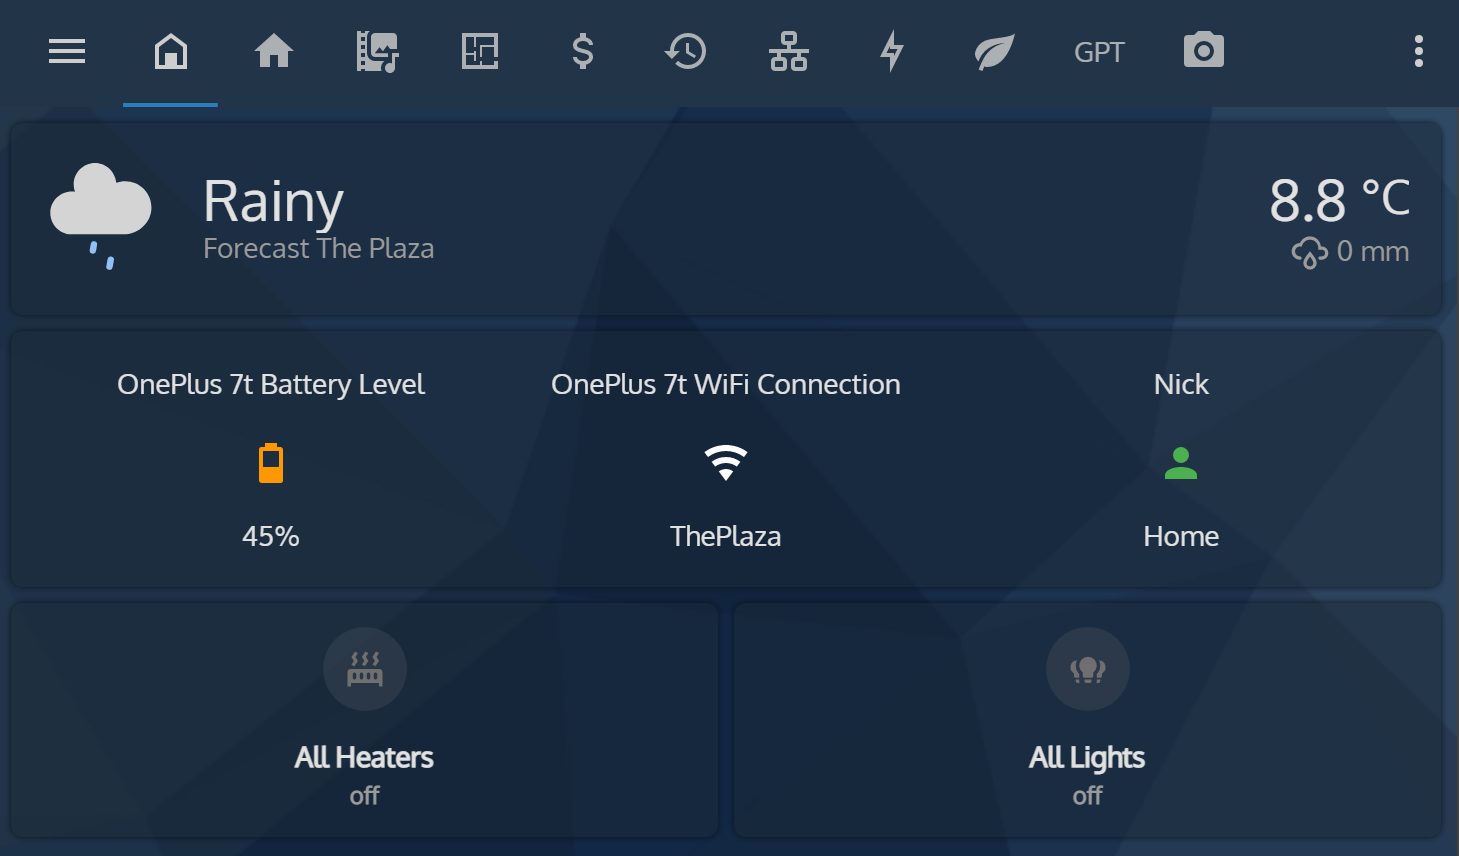
This is my main landing page for HA. I’ve designed this to be a nice simple overview showing weather, the Wi-Fi and battery state of my phone, and my presence based on the device tracker for my phone.
I also added a couple of quick access buttons I can use to turn off all lights or all heaters when leaving the flat. These buttons can give a quick indication as to if there are any lights or heaters on, as the buttons will indicate by turning red (heaters) or yellow (lights).
I used mushroom buttons for these as I prefer the aesthetic.
There is also a QR code just off screen that can be scrolled down to and scanned for any visitors I have wishing to connect to the Wi-Fi. I have a SurfacePro4 mounted on my livingroom wall which acts as a permanent terminal to HA and is perfect for use cases such as providing Wi-Fi QR to visitors.

Main Dashboard
The next dashboard is the dashboard I primarily use and has most of my smart home devices accessible via it.
In the top left you can see a mini version of the FloorPlan card that I custom designed. I made a post on this card so please do have a read if you’d like to.
Bike Charger – Last Charge Duration
I wanted to display the charge duration for the most recent charge cycle of my ebike battery. This enables me to quickly see how much was used on my previous ride and can help me to spot any issues in charging or battery capacity.
To do this, I setup a simple history stats sensor by adding the following to my configuration.yaml
sensor:
  - platform: history_stats
    name: Last Bike Charge
    entity_id: switch.bike_charger
    state: "on"
    type: time
    start: "{{ now().replace(hour=0, minute=0, second=0) }}"
    end: "{{ now() }}"
This element can then be easily displayed on the dashboard under the charger manual switch control. You can see in the screenshot, it took just shy of 7hrs for the last charge before low current detection caused it to cutoff.
Motion Sensors
I don’t tend to monitor these for any security reasons, but more for diagnosing any issues in the lights that they trigger and other associated automations. All of my motion sensors are battery powered zigbee devices and so they can be somewhat less reliable compared with mains powered modules. I’m yet to find a low cost mains powered Zigbee motion detector.

Media
I wanted a media panel for controlling my various media players and devices.
Adding my Chromecast, Next Mini and Android TV was simple as they all have Integrations that can be configured from the GUI.
I also added the power sockets for my TV and Speaker to this panel to enable quick power control.
Send to Android TV Section
This section hold a number of controls that I have configured to send commands directly to the AndroidTV
These controls send commands to the device that allow the AndroidTV to play media directly without needing some other device as the source. For example I can send a youtube playlist to be played and this would play directly on the youtube app on the AndroidTV rather than casting to the AndroidTV from a source device.
I also use a webscraper integration with these buttons for the ‘Music’ dropdown list. What this does is scrape the XML page of the selected youtube channel and searches for the most recently posted video and plays. This gives me a quick way of playing from a channel that I might often play from, without having to worry about my phone being there to be a source.
TV Control via DIAL Protocol
On doing a port scan of my network, I found that my JVC (Vitel) TV had a couple of ports open on its IP. I did some further research and found documentation for DIAL protocol (DIscovery And Launch). This is a smart feature that allows control of the TV over TCPIP and is what is utilised by the JVC Remote app that can be installed on a mobile phone.
Reading through various githubs for other TV models that also use DIAL, I was able to write the below code:
wget "http://192.168.8.x:12345/apps/SmartCenter" --post-data "<?xml version='1.0' ?><remote><key code='1234'/></remote>" &>/dev/nullWhen this command is run, the remote key code is run on the device.
KeyCode List
| Code | Function | Code | Function |
| 1000 – 1009 | Keys 0 – 9 | 1031 | Subtitle toggle |
| 1010 | Back | 1037 | Exit |
| 1011 | Aspect Ratio | 1040 | Favourites |
| 1012 | On/off | 1042 | Timer |
| 1013 | Mute | 1043 | Quick Settings |
| 1016 | Vol + | 1046 | App Dashboard |
| 1017 | Vol – | 1047 | EPG Toggle |
| 1018 | Info | 1048 | Main Menu |
| 1019/1032 | Down | 1049 | Break |
| 1020/1033 | Up | 1050 | Yellow |
| 1021 | Left | 1051 | Record |
| 1022 | Right | 1052 | Blue |
| 1024 | Stop | 1053 | OK |
| 1025 | Play / Pause | 1054 | Green |
| 1027 | Rewind | 1055 | Red |
| 1028 | Rewind | 1056 | Source |
To direct the TV to play particular media, DIAL was not needed and I could simply use commands directed at the AndroidTV integration. The below block shows a command that plays the latest video on a LoFi music channel. The state of sensor.yt_lofi is the result of the web scrape I mentioned earlier.
service: androidtv.adb_command
entity_id: media_player.android_tv
data:
  command: >-
    am start -a android.intent.action.VIEW
    https://www.youtube.com/watch?v={{states('sensor.yt_lofi')}}