
The BigTreeTech company manufacture a great range of 3D printer controller boards that can be really good upgrade options for most printers. I decide to go for one of these, as part of a number of upgrades I’m doing to my printer. I elected to go with the SKR_V3 which is their current latest board, boasting a 480MHz 32bit processor.
If you’ve picked up a BTT SKR_V3 board for your 3D printer, it may or may not come pre-flashed with a firmware.
In any case, its best to build your own firmware so that you can easily configure all the necessary variables and features for your particular printer hardware.
The process can be a little daunting for a beginner, so I thought I’d summarize it for anyone looking for a simple guide.
Here I’m going with Marlin, but you may choose to go with an alternative like Klipper. To me, Klipper seems like a waste on this board, with process offloading being a main feature, it wouldn’t be taking full advantage of the powerhouse we have.
Configuring the build
First off, you’ll want to start with downloading the Marlin nightly bugfix.
You’ll need the bugfix from the nightly channel as the main release doesn’t contain the right board definitions for the SKR_V3.

Once downloaded, extract it into a folder, we’ll be accessing this folder shortly ton configure everything.
Next you’re going to want to Install VSCode & PlatformIO if you don’t already have them.
https://code.visualstudio.com/download

Once you have installed VSCode from the link above, open it up and install PlatformIO via the Extensions tab (Ctrl+Shift+X)

Once that is installed, you can go ahead and open up the folder you extracted the Marlin firmware to, using the file menu in VSCode.
The first thing we will want to go in and edit here is platformio.ini, you can navigate to the file using the explorer tab (Ctrl+Shift+E). This file contains the core parameters that platformIO bases its build on.
We want to set the Default Environment (default_envs) to the right value for our board, in this case STM32H723Vx_btt


Next we need to navigate into the Marlin folder via the explorer tab, and open up Configuration.h.
Here we’ll do the main basic configuration of Marlin
First thing to set is the board type, scroll down to around line 70 to add this in, or Ctrl+F to it.
If you’re following this guide but for another board, just lookup your board in the boards.h located in the Marlin/Core folder.

Next to change, and just a few lines down is the serial port setup. I’ve configured mine to be serial over USB, so I’ve set SERIAL_PORT to -1. I set my BAUDRATE at 250000 being a fairly standard choice, but you can go slower if you run into issues.

Next we need to configure our stepper motor drivers, these settings are around lines 140 – 160.
I’m using the TMC2209’s so have set that accordingly, set yours from the list just above the definitions.

You also want to set this for the Extruder stepper driver a bit further down

Next, we’ll set our bed size and offsets. My bed starts 45mm from the zero position at the limit switch, so you can see I’ve set X_MIN_POS -45. Adjust this according to your bed size and offset and do the same for Y if you need to.

Next we want to set some software limits on our axes, this isn’t mandatory but it’s a nice thing to have, to stop your gantry crunching into a physical endstop.
This setting is found around line 1780, and you can see I’ve set mine to 260, 218 and 218 for X, Y and Z respectively.
If you’re not sure how to measure this on your printer, you can just set it approximately and tune it in at a later time once you’ve done an initial flash of the firmware and tested the limits.

Once those are set, we want to set our DEFAULT_AXIS_STEPS_PER_UNIT.
This is around line 1210 and if you don’t already know these values, you’ll need to do some maths to calculate them.
For the TronXY P802M with 16 microsteps you can go with the values in my screenshot, for other setups, have a look for a guide on calculating this theoretically, or tune it in iteratively by doing some print and movement tests.

You may want to explore the commented out sections of this file to see if there are additional features you’d like to enable, but for my initial setup that’s pretty much all we need to set here, next we can open up Configuration_adv.h
First in here I enable the debugging for the TCM drivers that I’m using, this just helps with getting things like steps per unit tunes in. Remove the comment from the line which will likely be around 3330

Having this in, now means that when we have the printer running and send it M122 GCODE, it will return lots of helpful information, rather than just an all OK message.
Whether you want to change from the default or just stick with the default microsteps value, you’ll probably want to check what it’s set to just to be sure of your step per unit values that you calculated in configuration.h.
You can check this around line 1385 or by searching for MICROSTEP_MODES. Here I’ve set mine to 16 for all drivers.

Next up we want to head to the tmc/config section around line 2836
Here we can configure our trinamic drivers. Set the X_CURRENT value to an RMS value safe for your stepper motor an do the same for the rest of the steppers further down in the file.
I’ve gone with 1250 here as my motors can handle 1.8A peak.
1250x1.414=1767.5
Build
Now that we’re all configured, we are ready to build.
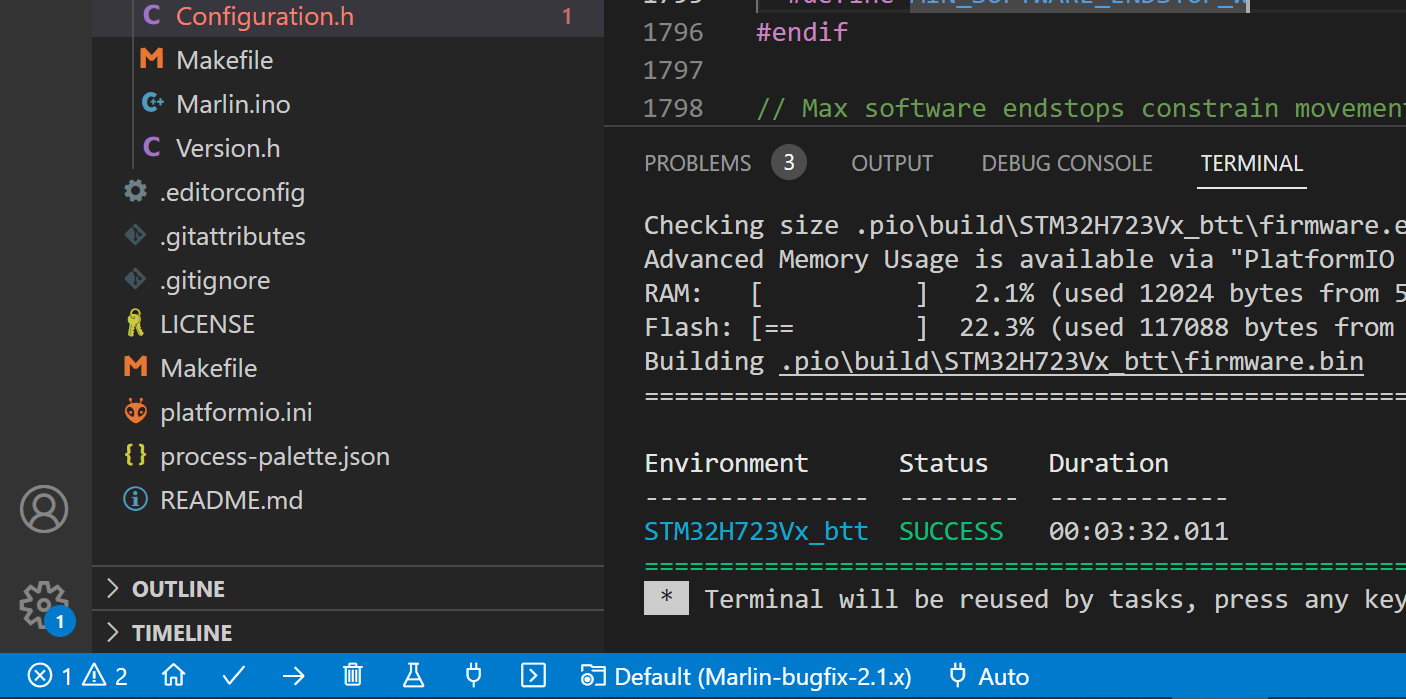
Set this process going by hitting the tick icon in the bottom left of VSCode

It’ll chug away getting everything compiled and then will eventually announce success.
If the build fails for any reason, scroll up in the terminal and look at the first red error to know what you need to go back and fix. Errors can be compound so always work from the first one, rebuild and check if later errors are also resolved.
Navigate to the folder of the build. You can do this from the Marlin folder you originally extracted .\.pio\build\YOUR_MCU\
In here you’ll find the firmware.bin that we will copy to a MicroSD card in order to flash the board.
NOTE: It is recommended to use a small capacity SD Card, I was not able to get a 128GB SD to work for flashing this board. 2GB formatted to FAT32 worked well for me
Once the firmware.bin file is loaded onto your MicroSD, all that’s left to do is put the card into your printer and power the printer up. The printer will flash the new firmware within the first 10 seconds of power up and will rename the file to firmware.cur.
Your fast way to check if the flash happened or not is to put the card back into your PC and check the file, if its cur then the flash at least happened.
You’ve now got an SKR_V3 flashed with Marlin2 and with the core config for basic operation on Tronxy P802M hardware.
Added note for anyone planning to communicate with this via USB to a Ubuntu machine, you’ll need to amend permissions so that /dev/ttyamc0 is accessible, this can be done by adding your user to the dialout user group:
sudo usermod -a -G dialout $USER