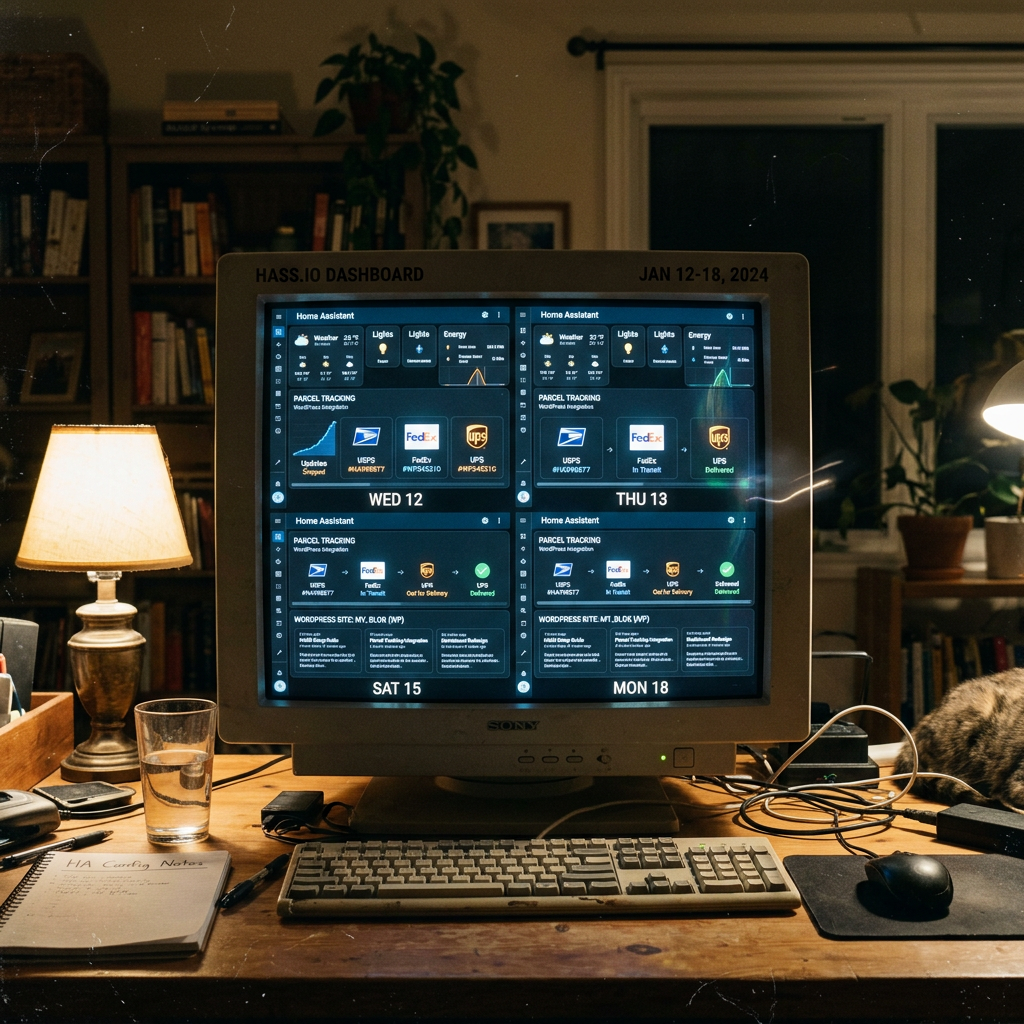
Four custom apps, four GitHub repos, four separate entries in my Supervisor add-on store, three or four separate places to remember to push updates to: that’s what scratching one itch at a time with Home Assistant eventually gets you. The housekeeping annoyed me enough in the end that I consolidated the lot into one repo: nict41-s-HA-Apps. One install, one update cycle, done.
“So what’s actually in it?”
Four apps, each built for a genuinely different reason, and each one I’ve ended up leaning on daily. Let’s go through them properly this time: how they work, what they need from you to set up, and the config knobs worth knowing about.
A quick note before we start: every app in this repo shares the same “app hostname” scheme. Home Assistant gives each installed app a hostname of the form {REPO}_{SLUG}, where {SLUG} is set in the app’s own config.yaml and {REPO} is a hash generated from the repo URL you installed it from. If you install straight from this repository, that hash is always beb500c8, so, for instance, Print Timelapse’s hostname is always beb500c8-print-timelapse for anyone using the repo as-is. I mention this once here because it comes up again below.
3D Print Timelapse

I’ve got a Tronxy P802M that’s been through more firmware iterations than I care to admit, and at some point I wanted a proper record of each print: not just a photo at the end, but a compiled timelapse showing the whole build-up, layer by layer. Home Assistant’s camera integration can grab snapshots easily enough, but there was nothing that would stitch those into an archive automatically. So I built one.
How it actually works. This app has no capture UI of its own: it’s a small FastAPI service with exactly three endpoints, and your Home Assistant automations are what drive it:
POST /start: call this the moment a print begins, with a uniquejob_id.POST /frame: call this once per integer percent of progress, passing the samejob_id, the currentpercent, and animage_url. Here’s the bit that tripped me up the first time: this endpoint doesn’t accept an uploaded image. Home Assistant’srest_commandaction can’t do file uploads, so instead the app fetchesimage_urlitself, over the network, whenever/frameis called.POST /finish: call this when the print completes. The app stitches every frame collected under thatjob_idinto a GIF, archives it permanently, and optionally exports a copy out to a network share.
Getting the frames reachable. Since /frame needs a URL it can fetch rather than a file you push to it, the simplest approach is to have your automation save the camera snapshot straight into Home Assistant’s www folder (/config/www/), which HA serves unauthenticated at /local/. Save a snapshot to /config/www/print_progress.jpg and it’s immediately available at http://homeassistant:8123/local/print_progress.jpg, exactly the kind of URL image_url wants. You can reuse the same filename for every frame across the whole print; the app fetches and archives its own copy the instant /frame is called, so the file only needs to hold the current frame at call time.
Setting up the rest_commands. This is the one manual step Home Assistant genuinely has no API for: you paste this into configuration.yaml yourself:
rest_command:
  timelapse_start:
    url: "http://beb500c8-print-timelapse:8099/start"
    method: POST
    payload: "job_id={{ job_id }}"
    content_type: "application/x-www-form-urlencoded"
  timelapse_frame:
    url: "http://beb500c8-print-timelapse:8099/frame"
    method: POST
    payload: "job_id={{ job_id }}&percent={{ percent }}&image_url=http://homeassistant:8123/local/print_progress.jpg"
    content_type: "application/x-www-form-urlencoded"
  timelapse_finish:
    url: "http://beb500c8-print-timelapse:8099/finish"
    method: POST
    payload: "job_id={{ job_id }}"
    content_type: "application/x-www-form-urlencoded"
Restart HA (or reload YAML) once that’s in, and the actions are callable from automations. Handy shortcut worth knowing: the newer versions of the app have an in-app Help page (the ? icon in the gallery header) that walks through all of this interactively, pre-filled with your own entity IDs, and can even create the three automations below directly, using the app’s own Supervisor-granted HA API access. You still have to paste the rest_command block by hand either way, since Home Assistant has no API for creating those.
Wiring the automations. The exact triggers depend on your printer integration (OctoPrint, Moonraker, Bambu Lab, whatever you’re running), but the pattern’s always the same: start a job when printing begins, capture a frame on every progress tick, finish when the print completes. The trick is generating a stable job_id once per print and reusing it across all three calls: the current approach derives it from the print-status sensor’s own last_changed timestamp, which only moves when the sensor’s value changes, so it stays fixed for the whole “printing” episode without needing a separate helper entity:
automation:
  - alias: "Timelapse: start"
    trigger:
      - trigger: state
        entity_id: sensor.printer_print_status
        to: "printing"
    action:
      - action: rest_command.timelapse_start
        data:
          job_id: "{{ trigger.to_state.last_changed.strftime('%Y%m%d_%H%M%S') }}"

  - alias: "Timelapse: capture frame"
    trigger:
      - trigger: state
        entity_id: sensor.printer_print_progress
    condition:
      - condition: template
        value_template: >-
          {{ trigger.to_state.state | int(0) != trigger.from_state.state | int(0) }}
    action:
      - action: camera.snapshot
        target:
          entity_id: camera.printer
        data:
          filename: "/config/www/print_progress.jpg"
      - action: rest_command.timelapse_frame
        data:
          job_id: "{{ states.sensor.printer_print_status.last_changed.strftime('%Y%m%d_%H%M%S') }}"
          percent: "{{ trigger.to_state.state | int }}"

  - alias: "Timelapse: finish"
    trigger:
      - trigger: state
        entity_id: sensor.printer_print_status
        to: "completed"
    action:
      - action: rest_command.timelapse_finish
        data:
          job_id: "{{ states.sensor.printer_print_status.last_changed.strftime('%Y%m%d_%H%M%S') }}"
Living with it day to day. The ingress panel shows a gallery of every archived GIF, with a summary bar (count, storage used, most-recent capture time) that follows your device’s light/dark setting. While a print’s actually being captured, a live “Capturing now” section shows each job’s latest frame as a thumbnail next to its progress. Archived GIFs show a still preview by default and only animate when you hit play, so the gallery isn’t a wall of looping animations the moment you open it. If a capture ever gets stuck (a print that never reached its final frame, say, after a crash or a cancelled job), the row’s ⋮ menu lets you clear just that job’s frames without touching anything already archived.
Config options (set under the app’s Configuration tab, or more conveniently from the in-app Settings page, which applies changes on the next finished timelapse with no restart):
| Option | Default | What it does |
|---|---|---|
cleanup_after_finish |
true |
Delete a job’s raw frames once its GIF is built |
gif_fps |
8 |
Frame rate of the assembled GIF |
gif_width |
480 |
GIF width in pixels (height scales proportionally) |
gif_export_path |
blank | Also copy every finished GIF to /media/<path> |
That last one’s worth a mention on its own: if you map a network share under Settings → System → Storage → Add network storage with usage set to Media, and then point gif_export_path at a subfolder there (e.g. NAS1/Photos and Videos/3D Print Timelapses), every finished GIF gets copied straight out to your NAS the moment it’s built, with no manual digging through the app’s own storage.
Everything lives under /data/current/<job_id>/ while a print’s in progress, and permanently under /data/archive/ once finished.
Glance Dashboard

This one’s less “solving a hard problem” and more “I wanted a nicer morning briefing.” Glance is a genuinely excellent self-hosted dashboard, covering RSS feeds, weather, bookmarks, calendars, Hacker News, stocks, Twitch, YouTube, Reddit, and a long list of other widget types, and I wanted it living inside Home Assistant’s sidebar rather than as yet another bookmarked tab I’d forget to check.
Setup is refreshingly simple. On first start, the app drops a default glance.yml into your main HA config folder, right alongside configuration.yaml. You can get at it three ways: the File Editor app (open glance/glance.yml from the root of your config), your Samba share (config/glance/glance.yml), or SSH (/config/glance/glance.yml), whichever you’re already comfortable with. Every widget type and layout option is documented upstream on Glance’s own configuration reference, since the app itself is just running Glance unmodified underneath.
One nice touch: Glance supports ${VAR_NAME} environment variable substitution in its config, and the app automatically sets GLANCE_BASE_URL so ingress works correctly out of the box; you can reference any other environment variable the same way if you need to keep secrets out of the config file itself.
The only app-level option is log_level (default info, one of trace/debug/info/warning/error/fatal) for tuning verbosity if you’re debugging a widget that isn’t behaving.
It runs behind Home Assistant ingress by default, so there’s no port to expose; it just appears in your sidebar. If you’d rather hit it directly (say, for a kiosk tablet outside the HA session), you can map port 8099 to a host port in the app’s network settings instead. After editing glance.yml, a simple restart of the app picks up the changes.
Parcel Tracker

This is the one I’m probably proudest of, mostly because of how much it doesn’t ask of me day to day. I order a fair amount from AliExpress and eBay, and manually copying tracking numbers out of confirmation emails into a separate tracker app got old fast. So now nothing gets typed in by hand at all; it just shows up.
How the detection actually works. The app connects read-only over IMAP, genuinely read-only, with nothing ever getting marked read, moved, or deleted, and periodically scans recent mail for tracking numbers. Emails from known retailers (AliExpress, eBay, Amazon, Cainiao) get parsed with a high-confidence, label-based detector, since their notification emails reliably print something like “Tracking Number: …”. Everything else falls back to generic carrier-pattern matching across UPS, USPS, FedEx, DHL, Royal Mail, DPD, Evri, YunExpress, and a handful of international postal formats (China Post/ePacket, Hongkong Post, Singapore Post, and others), gated behind shipping-related context so it doesn’t start “detecting” tracking numbers in, say, a takeaway order confirmation.
High-confidence matches get tracked immediately. Lower-confidence ones land in a “needs confirmation” queue rather than getting auto-tracked on a guess. This is where a tracking-provider API key earns its keep: with a 17track or Track123 key configured, every queued number gets registered for live carrier lookup. If the provider positively recognises it, resolving a real carrier or returning an actual tracking event, the parcel is auto-confirmed and starts tracking properly, correcting whatever guess the pattern-matcher made. If a provider never recognises a number after dismiss_unconfirmed_after_days (default 3), it’s automatically dismissed, on the logic that the provider’s response is really the authority on whether something’s a genuine tracking number at all: a mislabelled order ID that happened to look like one gets quietly cleared out rather than sitting there forever.
Setting up mailboxes. You can point the app at multiple accounts, such as a personal inbox and a shared family one, and everything lands on the same dashboard. For each mailbox, you either connect it directly with IMAP credentials (for Gmail, that means enabling IMAP under Settings → Forwarding and POP/IMAP, then generating an app password rather than using your real password), or you set up mail forwarding to a dedicated mailbox and point the app at that instead, if you’d rather not hand over credentials to your primary account. You can mix both approaches freely across different entries.
Per-mailbox config fields:
| Field | Default | Description |
|---|---|---|
host |
required | IMAP server hostname, e.g. imap.gmail.com |
port |
993 |
IMAP port |
use_ssl |
true |
SSL vs. STARTTLS |
username |
required | Usually the full email address |
password |
required | Mailbox password or app-specific password |
folders |
INBOX |
Which folders to scan |
And global options across all mailboxes:
| Option | Default | Description |
|---|---|---|
lookback_days |
14 |
How far back each check scans |
poll_interval_minutes |
30 |
How often mail is checked and status refreshed |
auto_archive_after_days |
14 |
Auto-archive parcels this long after delivery (0 disables) |
dismiss_unconfirmed_after_days |
3 |
Auto-dismiss unconfirmed candidates (0 disables) |
trusted_senders / ignore_senders / allowed_senders |
blank | Sender-domain allow/deny lists |
seventeentrack_api_key / track123_api_key |
blank | Optional live-tracking provider keys |
On the provider keys specifically: 17track gives new accounts a one-time trial of 200 tracking numbers that doesn’t renew monthly, so it’s fine for an initial batch but not sustainable long-term on its own. Track123’s free tier is smaller per month (50 numbers) but actually renews, which makes it the better default for ongoing use. If you configure both, new parcels register with Track123 first and only fall back to 17track once Track123 is unavailable; and once a parcel’s registered with one provider, it sticks with that provider on every future refresh rather than switching and burning quota on both. The app is also careful about a specific Track123 quirk: its “instant tracking” lookup, used as a fallback when a number’s been accepted but has no events yet, costs a credit on every call, so it’s throttled to at most once a day per stuck number and stops entirely after a few consecutive empty attempts, though the dashboard’s Refresh from API action on any parcel always lifts that limit for one deliberate check.
Living with the dashboard. Parcels are grouped into Needs confirmation, In transit, Delivered, and Archived sections, each collapsible and remembered per-browser. Clicking any card expands its full tracking history, showing every event a provider’s recorded and not just the latest, along with a carrier link and confirmation details. Anything detected from an email has a View email action in its ⋮ menu that renders the original message in a locked-down sandbox (scripts disabled, remote images blocked until you explicitly opt in), handy for sanity-checking a detection without leaving the dashboard. There’s also View API diagnostics on anything that’s been checked against a provider at least once, showing the raw request/response for that check (API keys always redacted), which has saved me a few times when a tracking number just wasn’t behaving. A manual add parcel form covers anything that didn’t arrive by email at all.
Home Assistant integration. With zero extra setup (the app uses its own Supervisor-granted HA API access), every parcel shows up as a sensor entity. sensor.parcel_tracker_summary gives you overall counts plus a full parcel list as an attribute; sensor.parcel_tracker_<tracking-number> gives you one entity per parcel with its status (pending/active/exception/delivered), perfect as an automation trigger for a specific delivery:
automation:
  - alias: Notify when a parcel is delivered
    trigger:
      - platform: state
        entity_id: sensor.parcel_tracker_1z999aa10123456784
        to: "delivered"
    action:
      - service: notify.mobile_app_your_phone
        data:
          message: "Delivered: {{ trigger.to_state.attributes.description }}"
There’s also a companion Lovelace card, which reads straight from sensor.parcel_tracker_summary and mirrors the dashboard’s own grouped layout with progress steppers and carrier chips. The app copies the card’s JS into /config/www/ automatically, so it’s reachable at /local/parcel-tracker-card.js through whatever remote-access setup your HA instance already uses (Cloudflare Tunnel, Nabu Casa, whatever). Just add it as a resource and point api_base at the app’s direct port so its on-demand fetches (archived parcels, full history) know where to go. It’s deliberately read-only: no confirming, archiving, or deleting from the card itself, only from the app’s own dashboard.
All parcel and sync state lives locally in /data/parcels.db (SQLite). The mailbox itself is never touched.
WordPress

And yes, this is the very app running the blog you’re reading this on. Self-hosted WordPress on the official wordpress:php8.3-apache image, bundled with its own MariaDB server, so there’s genuinely no separate database app to install and babysit alongside it.
Getting started is about as close to zero-config as it gets. Install the app, start it, and with the default empty db_host, it spins up its own internal MariaDB server and creates the WordPress database and user automatically on first boot. Open the web UI (or http://<home-assistant-host>:8080 directly) and walk through the normal WordPress installation wizard. That’s genuinely it.
Everything lives under the app’s own persistent storage: WordPress itself in /data/wordpress, the database in /data/mysql, and daily compressed SQL dumps in /data/backups (the newest 7 are kept, written on every start and once a day while running). Those dumps aren’t just for peace of mind: they double as automatic disaster recovery: if the app ever starts up and finds an empty database directory but dumps still sitting in /data/backups, it restores the newest one automatically and logs that it’s done so.
Config options, for anyone who wants more than the defaults:
| Option | Description |
|---|---|
db_host |
Leave empty for the built-in database (recommended), or set a hostname to use an external server instead |
db_name / db_user / db_password |
Database credentials, auto-generated for the built-in DB if left blank |
table_prefix |
WordPress table prefix, default wp_ |
locale |
Install locale, e.g. de_DE |
debug |
Toggles WP_DEBUG |
config_extra |
Raw PHP injected straight into wp-config.php, applied on every restart even on an existing install |
That last one is more useful than it sounds. Two examples straight from my own setup: if you’re accessing the site purely over LAN with no real HTTPS anywhere, WordPress hides the Application Passwords feature (which Jetpack and similar REST-API tools rely on) unless it thinks it’s either on HTTPS or in a local environment: setting config_extra to define('WP_ENVIRONMENT_TYPE', 'local'); fixes that. If instead you’re behind a reverse proxy or tunnel that terminates real HTTPS in front of the app (a Cloudflare Tunnel, say), WordPress needs to trust the X-Forwarded-Proto header to know the original request actually was HTTPS:
if (isset($_SERVER['HTTP_X_FORWARDED_PROTO']) && $_SERVER['HTTP_X_FORWARDED_PROTO'] === 'https') {
    $_SERVER['HTTPS'] = 'on';
}
On networking: the app deliberately skips Home Assistant Ingress, exposing itself directly on port 8080 instead. WordPress generates absolute URLs everywhere, for assets, links, and the admin area, and that doesn’t play nicely with Ingress’s path-prefixed proxy. If you want HTTPS, the recommended route is putting a reverse proxy app (Nginx Proxy Manager or similar) in front of it rather than fighting Ingress.
If you’d rather use an external database, say the community MariaDB app instead of the built-in one, install that separately, create a database and login for WordPress inside it, note its internal hostname (typically core-mariadb), and point this app’s db_host/db_password at it. Migrating an existing external database into the built-in one is just as straightforward: dump it (mysqldump wordpress > /share/wordpress-restore.sql), drop the file into Home Assistant’s share folder as wordpress-restore.sql, clear db_host, and restart: the app imports it automatically and renames the file so it doesn’t re-import on the next boot.
Everything, including WordPress core, wp-content, the database, and its dumps, lives under the app’s own /data, so it’s included wholesale in Home Assistant’s normal backup/snapshot system, and survives the app’s own updates untouched (updating the app itself only refreshes the underlying PHP/Apache/WordPress base image).
All four apps are open source under the one repository: grab the repository link, add it to your Home Assistant app store, and have a poke around.